How the Print is made
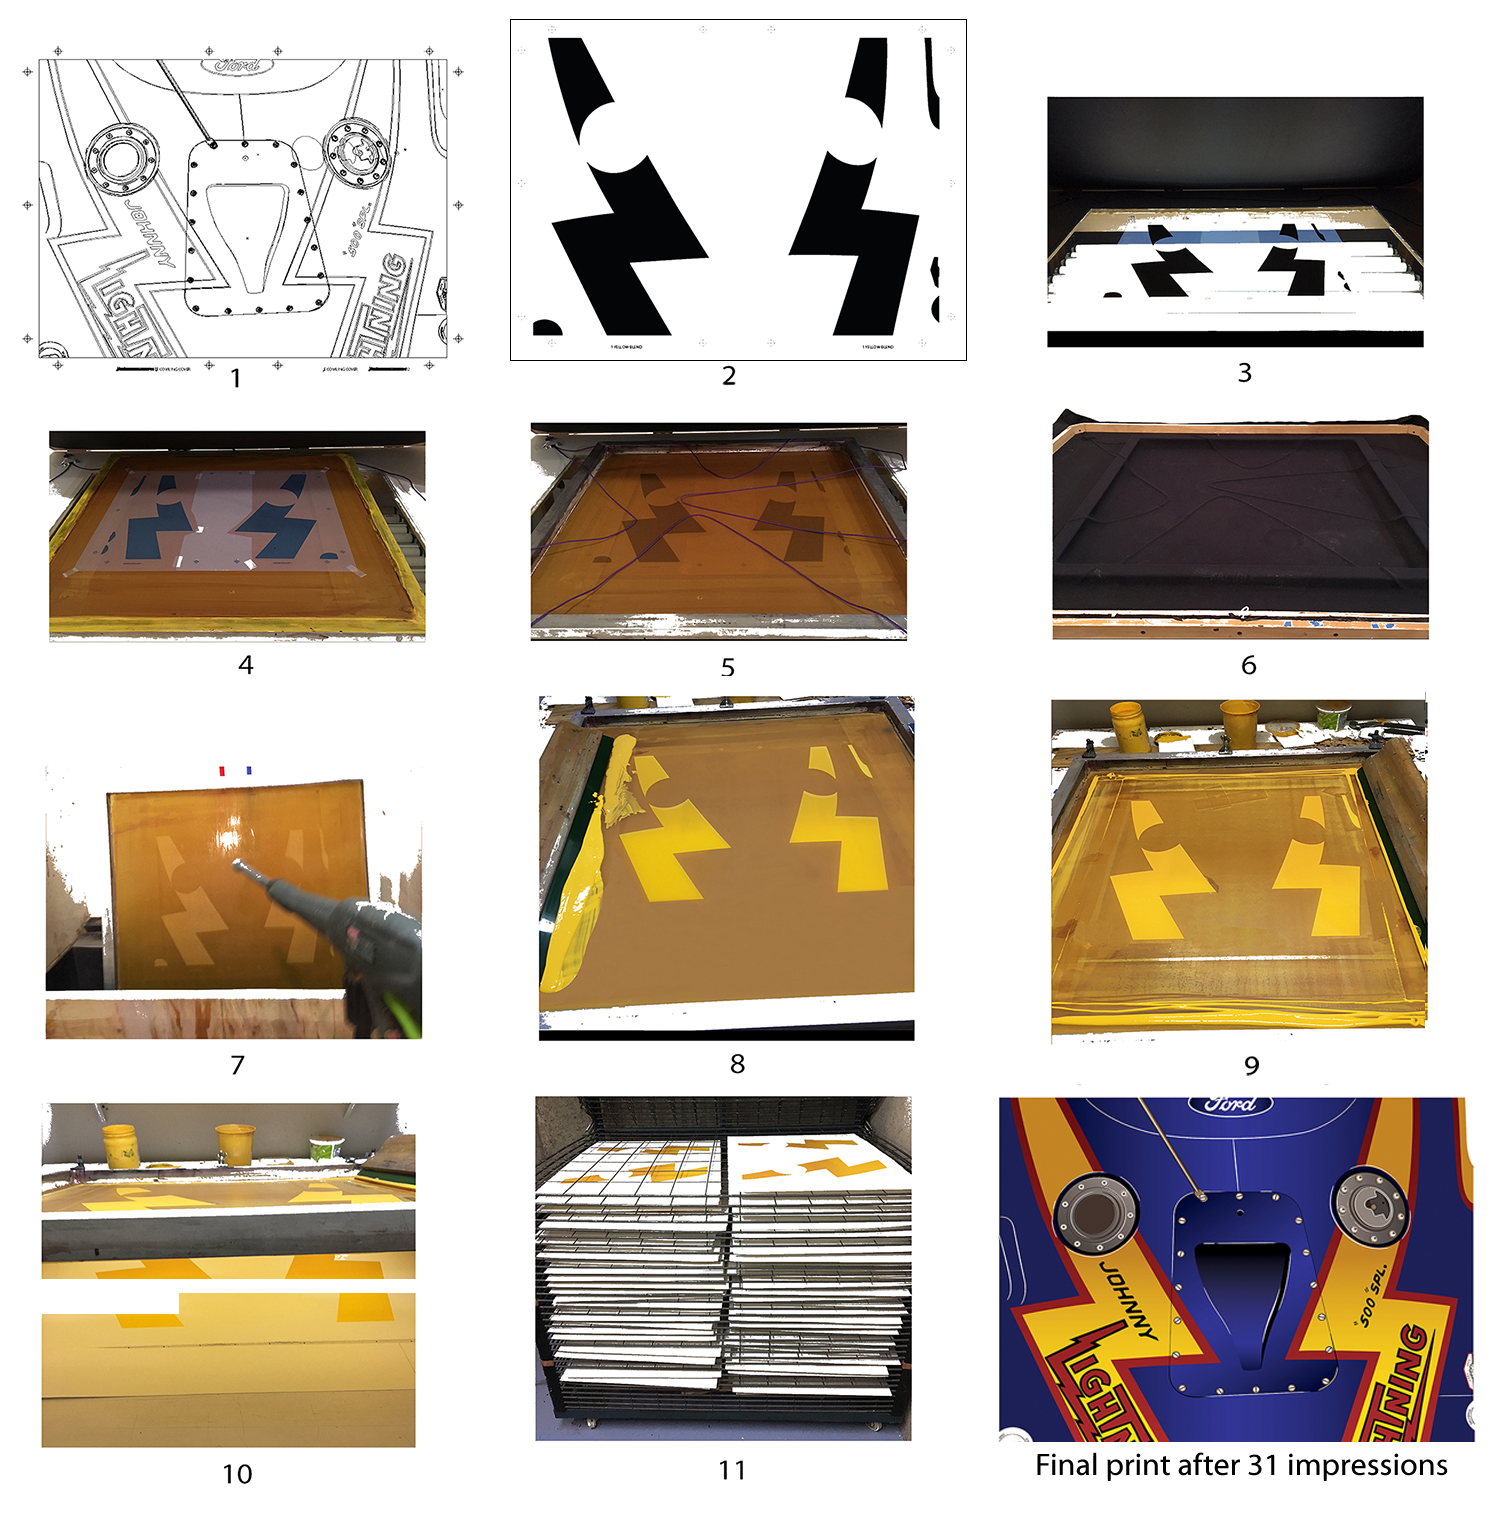
A photo shoot is made and a single photo selected to work from. The image is interpreted to determine what colors are to be used to best capture what will become the final print. Each color in that pallet is then custom mixed to print the stencils used to make the screens for printing. Some stencils are printed with two colors at the same time to create a gradient. In the example that follows a dark yellow is at the top and a light yellow at the bottom.
The basic procedure is as follows:
1. In Adobe Illustrator each item in the photo is drawn by hand
2. The outline for one color to be printed is selected and filled black
3. That image is printed on a clear positive to be used as a stencil
4. The stencil is placed on the bottom of a screen coated with a light activated photo emulsion
5. The screen and stencil are placed in a vacuum exposure unit
6. The screen and stencil are exposed to a intense light for 20 minutes
7. The stencil is removed and the screen is washed with a pressure sprayer to remove the unexposed emulsion leaving the openings in the screen that will be printed.
8. The screen is placed in a hand press and custom mixed ink is placed on the surface of the screen
9. A sheet of print making paper is placed under the screen and a squeegee is pulled from left to right on the surface forcing ink through the openings in the stencil and onto the paper
10. The sheet has been printed under the screen and ready to be racked
11. The printed sheet is placed on a drying rack and the next sheet is printed. The process is repeated until the first stencil has been printed on each sheet that will become part of the edition.
After the first color is printed
The screen then has all the emulsion removed, then is washed and degreased, dried and finally coated with a new layer of photo emulsion.
The next stencil is created; the next color custom mixed and printing is repeated until the second color is printed on each sheet.
The entire process is repeated for each stencil until all the colors have been printed revealing the final image.
Final prints are scrutinized and any flawed prints are destroyed along with the stencils.
The remaining prints become the edition and are signed and numbered by the artist. In the case of the Indy cars 45-50 sheets are printed to begin with to get the final 33 that become the edition.
There are usually several good prints in addition to the 33 and are signed “AP” to denote that they are Artist’s Prints.


